
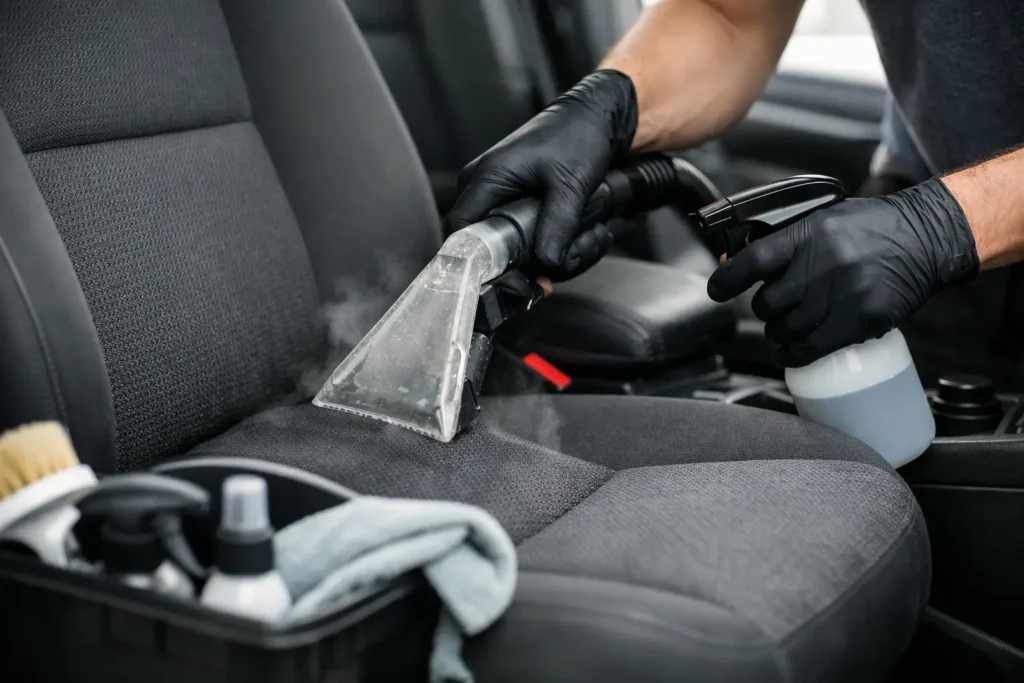
A clean exterior makes a strong first impression, but car seats are where everyday life leaves its mark. Coffee spills, kids’ snacks, pet hair, sunscreen and Sydney’s summer humidity can quickly make an otherwise well-kept vehicle feel tired. Learning how to clean car seats professionally means more than spraying a cleaner and wiping it away – it is about using the right process, the right amount of moisture and the right product for the material.
A professional result should leave seats looking fresh, smelling clean and feeling dry to the touch, without water marks, sticky residue or damage to the upholstery. The method changes slightly for cloth, leather and specialised trims, but careful preparation is the foundation every time.
Start with a proper assessment
Before reaching for any cleaning product, identify what you are working with. Most vehicles have fabric upholstery, leather, synthetic leather or a combination of materials. Some premium interiors also include suede-like Alcantara panels, perforated leather, contrast stitching or heated and ventilated seats. These surfaces need a lighter touch.
Check the seats in good light and look for the source of staining. A fresh coffee spill needs a different approach to an old grease mark, while pet hair and embedded sand are mechanical-cleaning problems before they become chemical-cleaning problems. Also inspect the seat belts, seams, headrests and the gap between the seat base and backrest. These are the places that often hold the most grime.
If you are unsure of the material or product suitability, test any cleaner on a small, hidden section first. This simple step can prevent colour fade, patchiness or a change in the material’s finish.
Remove dry soil before adding moisture
The most common mistake in DIY interior cleaning is applying cleaner too early. Dirt, crumbs and grit become muddy when wet, pushing further into fabric fibres and leaving a dull finish once dry.
Begin by removing rubbish and taking out the floor mats. Move the front seats forward and back to access the rails and surrounding carpet. Use a vacuum with a crevice tool to clean the seat cushions, backs, side bolsters, stitching and seat tracks. A soft detailing brush helps lift dust from seams and textured surfaces while you vacuum.
For family vehicles, SUVs and commercial cars, this stage can take longer than expected. Pet hair may require a rubber brush or dedicated pet-hair tool, and fine sand often needs repeated vacuuming. It is time well spent. The less loose soil left behind, the cleaner and more even the final result will be.
How to clean fabric car seats professionally
Fabric seats respond best to controlled cleaning rather than saturation. The aim is to lift soil from the fibres while keeping the padding underneath as dry as possible.
Treat stains with restraint
Apply a suitable upholstery cleaner to a soft brush or microfibre cloth rather than heavily soaking the seat. Work one small area at a time, using gentle agitation to loosen dirt. For visible spots, blot first with a clean cloth. Rubbing aggressively can spread the stain or roughen the fabric.
Food, drink and everyday grime often respond well to an upholstery cleaner. Oily marks may need a product designed for grease, while ink, dye transfer and makeup can be more difficult. Avoid mixing household chemicals or using harsh solvents. They can bleach upholstery, weaken adhesive beneath the fabric and create unpleasant fumes in a closed cabin.
Extract, do not overwet
Professional interior detailers commonly use an upholstery extractor because it flushes loosened soil out of the fabric while recovering the dirty water. At home, a wet-and-dry vacuum can help, provided it is suitable for liquid extraction and used carefully.
Use light, overlapping passes. Spray only enough solution to work the surface, then extract it promptly. Repeat as needed rather than flooding the seat in one go. Excess water can soak into the foam, extend drying time and leave a musty smell. In some cases, it may also interfere with electrical components located under modern seats.
Once the seat looks clean, make a final extraction pass with no additional product. This helps remove remaining moisture and detergent residue, which is often the cause of stiff or rapidly re-soiling fabric.
Cleaning leather and synthetic leather safely
Leather seats need cleaning too, but they should never be treated like fabric. Leather has a protective coating that can become dull, dry or slippery if it is cleaned with strong detergents, oil-heavy dressings or household wipes.
Vacuum first, paying close attention to perforations and stitching. Then apply a pH-balanced leather cleaner to a microfibre applicator or soft leather brush, not directly to the seat. Work gently in small sections, especially on the driver’s seat bolster, steering wheel-side edge and armrest, where body oils and sunscreen tend to build up.
Wipe away the loosened grime with a clean, dry microfibre cloth. The finish should look clean and natural – not glossy. A high-shine dressing can make leather look artificial and may leave the seating surface slippery.
After cleaning, use a quality leather protectant or conditioner if it is appropriate for the vehicle’s trim. This can help maintain suppleness and reduce the impact of UV exposure. Synthetic leather usually requires less conditioning, so use a product specifically labelled as safe for that material.
Take extra care with perforated and light-coloured leather
Perforated leather should be cleaned with minimal liquid. Product can pool in the small holes and settle beneath the surface, creating marks or affecting ventilation functions. Light-coloured seats also show denim transfer and sunscreen residue quickly, so regular gentle cleaning is more effective than occasional heavy scrubbing.
For Alcantara or suede-style inserts, avoid saturating the material and avoid leather conditioner altogether. A soft brush and a cleaner approved for that specific trim are the safer choice.
Eliminate odours at the source
A fragrance is not an odour solution. If the cabin smells stale after cleaning, the source may be hidden in the seat foam, carpet, floor mats, air-conditioning system or boot.
For minor odours, thorough vacuuming and controlled upholstery cleaning can make a real difference. Make sure the seats dry completely with doors open in a shaded, ventilated area where possible. Direct harsh sun can dry some materials too quickly and may leave marks, while a closed car can trap humidity.
Persistent smells from milk, pet accidents, smoke or a major drink spill may need specialised treatment. An enzyme-based odour treatment can help with organic contamination, while smoke odour often requires a more comprehensive interior clean. If the smell remains after the surface looks clean, avoid masking it with strong air fresheners. A professional inspection can identify whether the issue has reached the seat foam or surrounding carpet.
Drying is part of the professional process
A seat is not finished when it looks clean. It is finished when it is fully dry, evenly coloured and free from residue. Leave windows or doors open in a secure, well-ventilated area, and use fans to move air through the cabin if available.
Drying times depend on the weather, fabric thickness and how much moisture was used. In humid conditions, fabric seats may take several hours. Do not refit child seats or cover damp seats with towels, blankets or seat covers. Trapped moisture can create odours and encourage mould growth.
Before driving, run a clean dry hand across the seat surface. It should not feel cold, damp or sticky. Check the seams and the centre of the cushion, which can stay wet longer than the outer edges.
Keep seats cleaner between deep cleans
Professional-looking interiors are easier to maintain than restore. Deal with spills quickly by blotting them with a clean absorbent cloth, then use a suitable cleaner if needed. Vacuum regularly, particularly around seat creases and under child seats, where crumbs and grit accumulate unnoticed.
For busy family cars, rideshare vehicles and work utes, a light interior refresh every few weeks can prevent grime becoming embedded. A deeper clean is often worthwhile before selling a car, after a long road trip, following a wet season or whenever the cabin no longer feels fresh.
Some stains and odours are simply beyond a safe home treatment. If your vehicle has heavily soiled fabric, delicate leather, smoke contamination or seats that have already been overwet, professional detailing is usually the better value choice. Premium Car Wash in Enfield provides careful interior cleaning as part of its premium hand car care, helping Sydney vehicle owners restore the clean, presentable cabin their car deserves.
The best result is not a seat that merely looks cleaner from a distance. It is an interior that feels fresh every time you get behind the wheel, with materials treated carefully enough to stay that way.